You can install an COLLABORATION Butler add-on that will pick up files from Salesforce when they are uploaded and moves these into the correct SharePoint Site, Library and Folder.
The add-on will contain:
- Trigger on ContentDocumentLink: This will pickup any files added to a Salesforce Record. The trigger will run a Flow that you have built with the information on where and how to store the files. We split the work and upload each file via separate processes to reduce the risk of hitting Salesforce limits. But, if your file is too big (more then 9MB), there is a chance we cannot move the file automatically as it hits the Salesforce limit
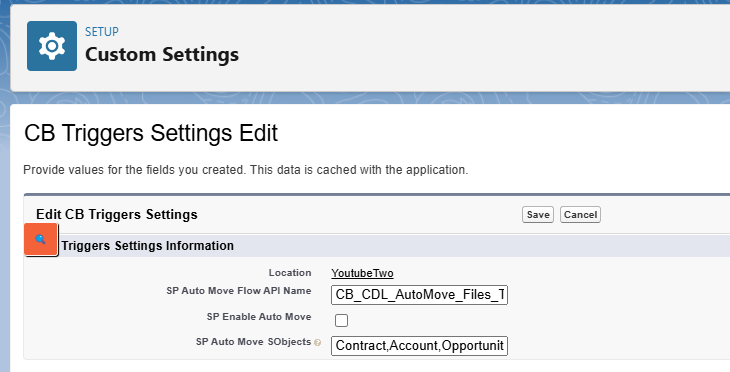
- A Custom Setting: this has the information on which Flow to run and on which SObjects the files must be moved
- SP Auto Move Flow API Name: Set the API name of the flow (NOT the label!!)
- SP Enable Auto Move: When checked, the files will be moved, uncheck to de-activate the auto-move functionality
- SP Auto Move SObjects: Comma separated list of Object API names

You will have to create a Salesforce Flow to define where the files should be moved to and what actions to take on the files.
Following variables have to be created on the Flow:
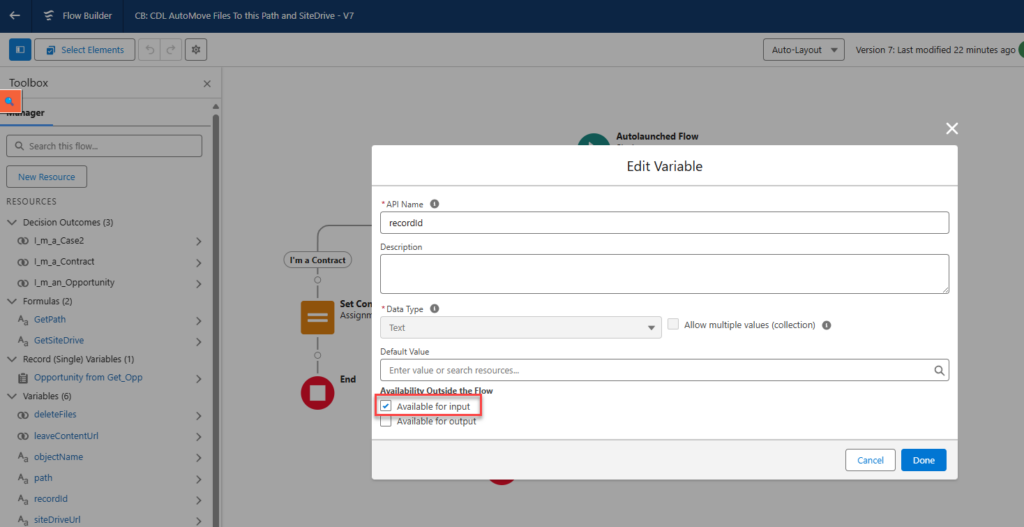
Variables marked “Available for input”
- recordId: Id of the record the File was linked to. DataType: Text
- objectName: Name of the SObject the File was linked to. DataType: Text
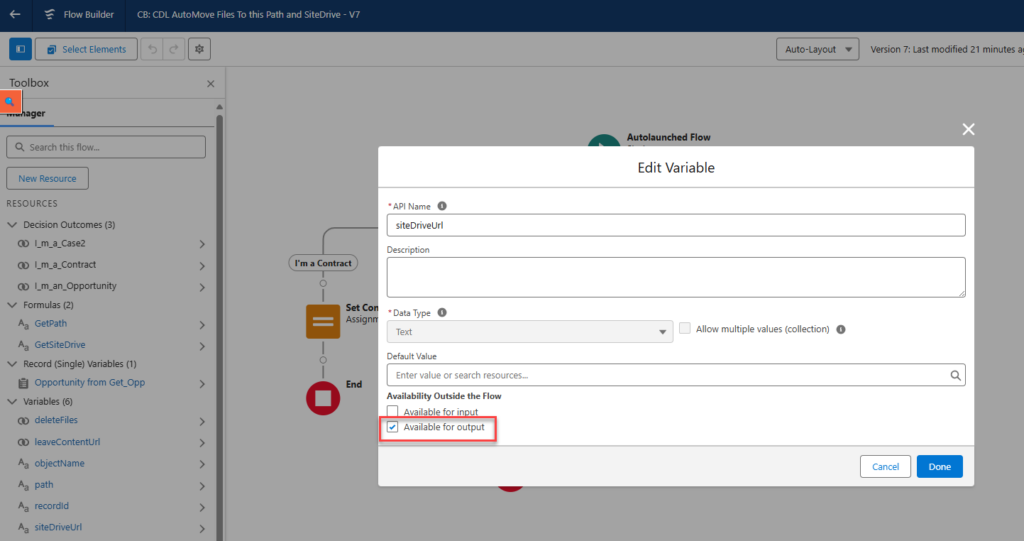
Variables marked “Available for output”
- siteDriveUrl: URL to the SharePoint Site and Document Library. DataType: Text
- path: Path the the folder in which the files should be stored (must start with a /). DataType: Text
- deleteFiles: Indicator if the files in Salesforce must be deleted after they are successfully moved to SharePoint. DataType: Boolean
- leaveContentUrl: Indicator if there must be a link created in Salesforce Files to the the file in SharePoint. DataType: Boolean
Example of the flow

Example of an input variable

Example of an output variable


