Although you might use the COLLABORATION Butler component as much as possible for all file handling there might still be processes in which files are stored in SFDC (eg Case Emails).
You can install the COLLABORATION Butler add-on, which picks up files from Salesforce when they are uploaded and moves them into the correct SharePoint Site, Library, and Folder. More detailed explanation is given in the form of example.
Install link for add-on (requires a recent version of COLLABORATION Butler): /packaging/installPackage.apexp?p0=04tWV0000002pPp
The add-on will contain:
- Trigger on ContentDocumentLink: This will pickup any files added to a Salesforce Record. The trigger will run a Flow that you have built with the information on where and how to store the files. We split the work and upload each file via separate processes to reduce the risk of hitting Salesforce limits. But, if your file is too big (more then 9MB), there is a chance we cannot move the file automatically as it hits the Salesforce limit
- Flow Action: Use this flow action to move Files linked to Records in Salesforce when you decide that they should be moved. The Flow Action can be used in a record triggered Flow that can move files when a record reaches a certain condition. For more information, click here.
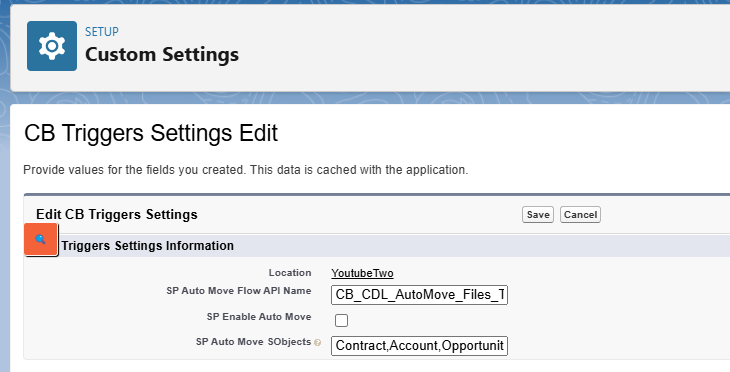
- A Custom Setting: this has the information on which Flow to run and on which SObjects the files must be moved
- SP Auto Move Flow API Name: Set the API name of the flow (NOT the label!!)
- SP Enable Auto Move: When checked, the files will be moved, uncheck to de-activate the auto-move functionality
- SP Auto Move sObjects: Comma separated list of Object API names

It is important to note that this add-on is open-source. After install you can modify the code if required to add features. This also means that you can debug (eg Debug logs) the package yourself and can find errors in your configuration without contacting our support teams. Our support teams will request you to first analyse and debug your configuration.
If you need help on complex situations, contact your PDF Butler Account Manager for consulting hours.
Limits enforced by Salesforce:
- files cannot be bigger then to approximately 10MB
- there can only be 50 files uploaded
If you want to go over these limits, talk to us. Through custom consulting it is still possible to by-pass these Salesforce limitations.
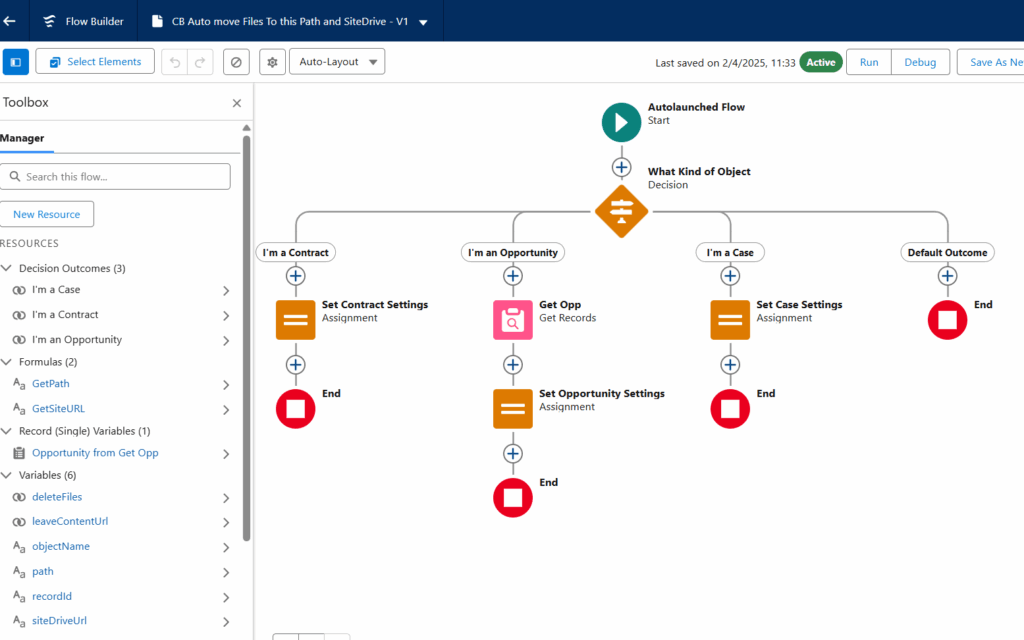
Example of a Flow:
Create a Flow in Salesforce to determine the SharePoint Site, Library and folder to which the files should be moved.
Create Below Variables on the Flow:
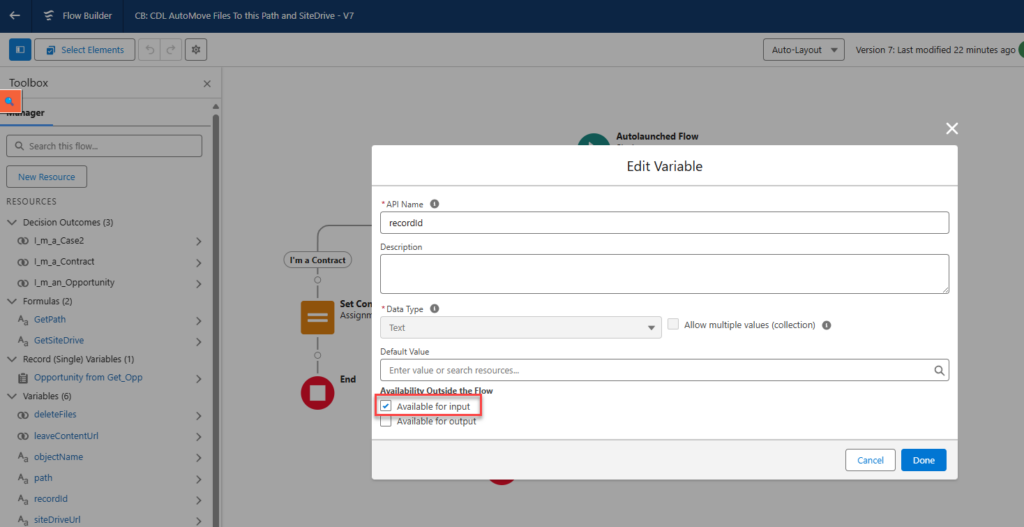
Input (check on variable “Available for input”):
- recordId: Id of the record the File is related to. DataType is Text.
- objectName: Name of the sObject the File is related to eg Opportunity (this can also be a custom sObject). DataType is Text.
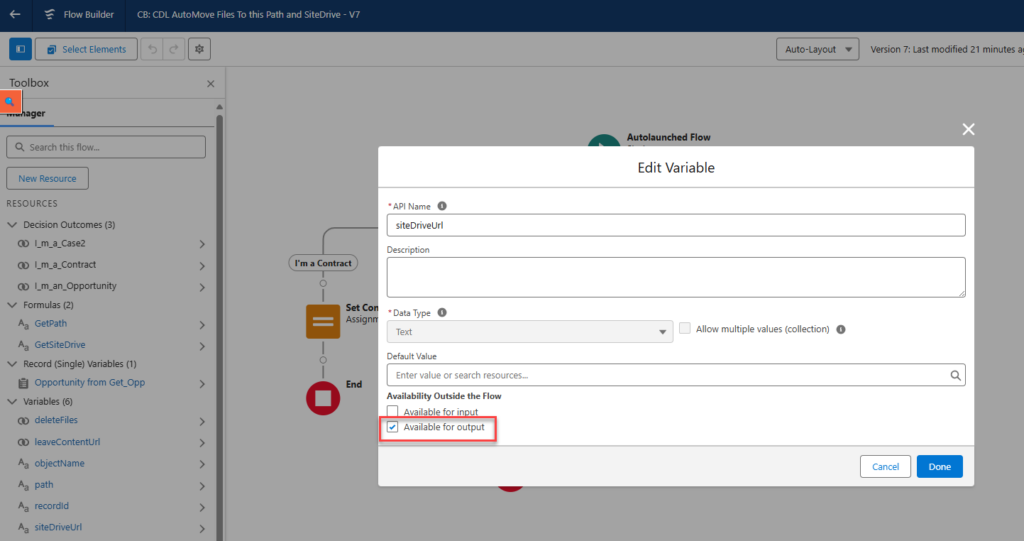
Output (check on variable “Available for output”):
- siteDriveUrl (Mandatory): The SharePoint URL to the Site and Library. DataType is Text.
- path (Mandatory): The path the folder in which the files must be stored. DataType is Text.
- deleteFiles (Optional): By default “true”, indicates that the file should be deleted in Salesforce after moving to SharePoint. DataType is Boolean.
- leaveContentUrl (Optional): By default “false”, indicates to leave a URL in Salesforce FILES that points to the file in SharePoint. When clicking the URL, the preview of the file in SharePoint will open in a new tab. DataType is Boolean.
Example of an input variable
Example of an output variable
Follow below steps to create remaining flow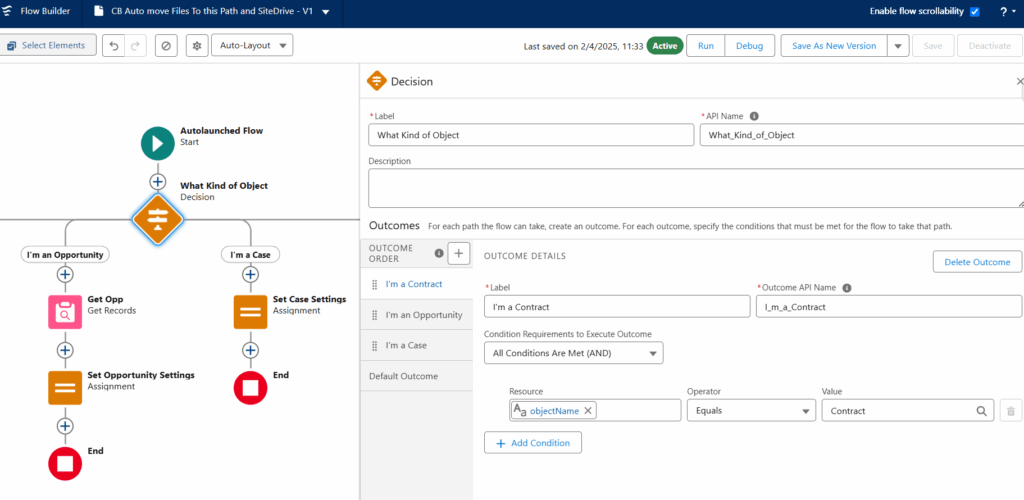

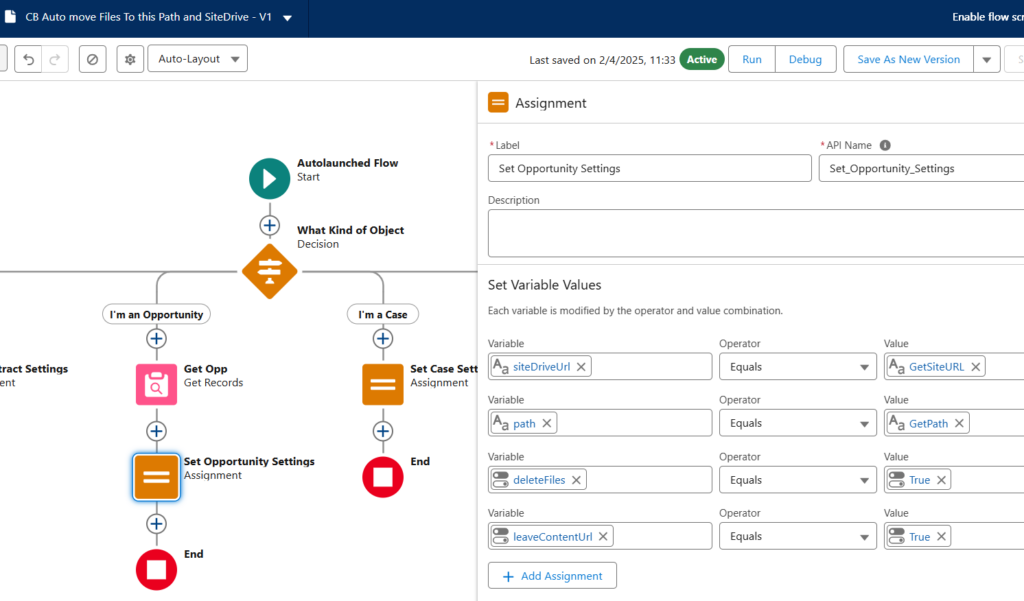
Assign values to all four output variables according to your requirement. In this example, we are assigning opportunity siteDriveURL and path variables by creating formula fields GetSiteURL and GetPath which will get values from related opportunity fields as shown below. This is why we have to Get Opportunity record fields values before this step.


Setup configuration: As you know, this add-on package will create a Custom Setting. Open that custom setting and follow below steps.
- Create a new “Organization Level” record in the Custom Setting

- Configure it
- SP Enable Auto Move: Checkbox to enable or disable the auto-move.
- SP Auto Move Flow API Name: API name of the flow you have configured in the step above
- SP Auto Move SObjects: Comma separated list without spaces of API names of sObjects (Standard and Custom) that are enabled for moving files. Objects not in this list will not be considered to move files. eg Contract,Account,Opportunity,Case,My_Cool_Object__c

How to test: Open any opportunity. Update the Site URL and path fields accordingly. Upload Files from Contract Butler component


Flow Action:
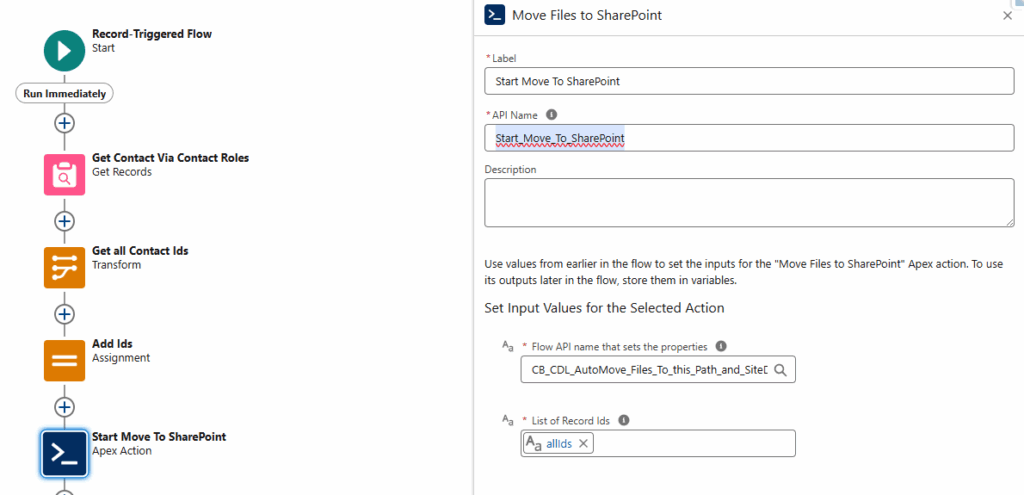
In some cases, you may only move files at a specific moment or when certain criteria are met. This add-on package will create an invocable Apex class named “MoveFilesToSharepointInvocable” in your org and make use of this to move files from calling Apex action “Start_Move_To_SharePoint”.
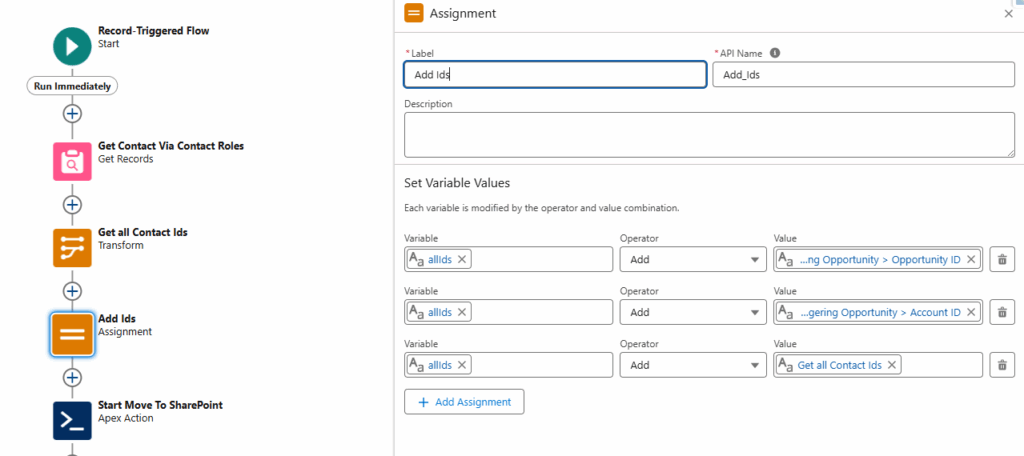
Let’s say, you want to move all Files related to the Opportunity, Account and Contacts in Opportunity Contact Roles when an Opportunity goes to Closed Won. So, create a record triggered flow on opportunity which will trigger when an Opportunity goes to Closed Won.
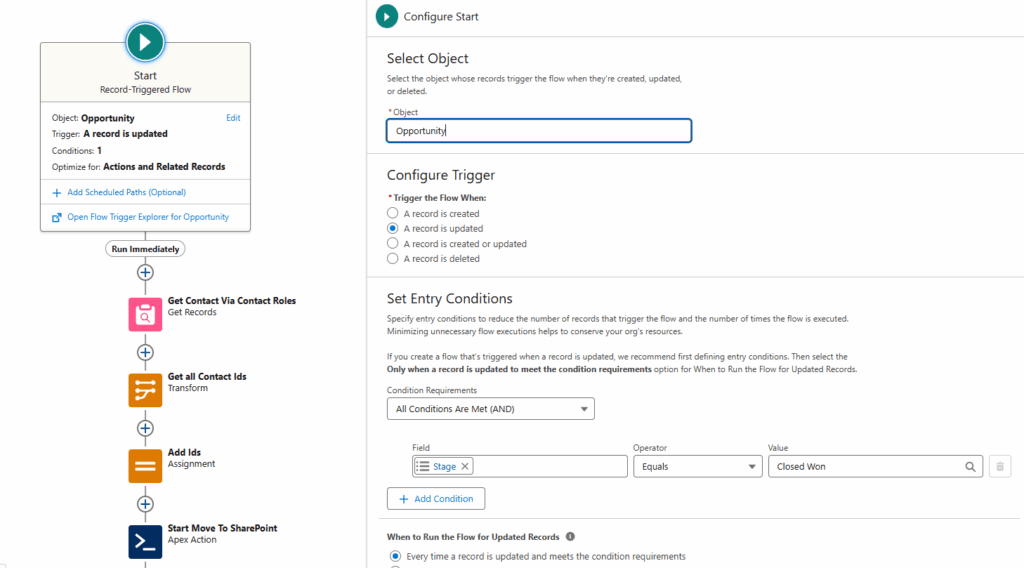
To enable the Flow Action, we need to collect all Record Ids of which we wan to move over the Files to SharePoint:
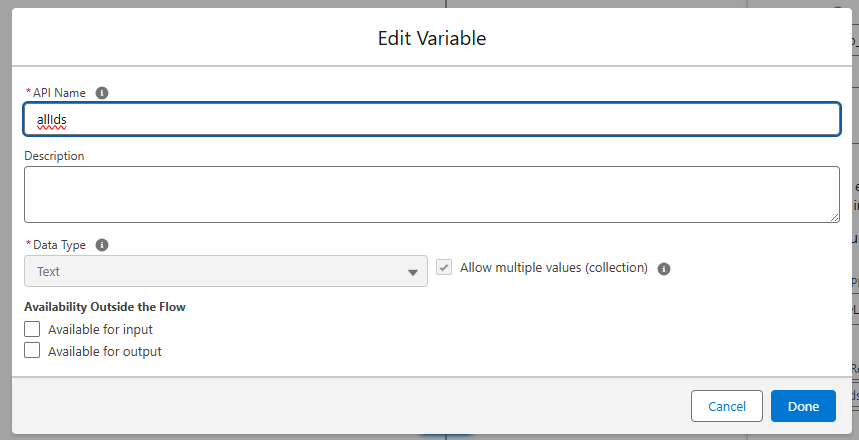
- Create a Variable in your (Triggered) Flow:
- We called the Variable : allIds (but you choose the name 😉 )
- Type: Text
- Collection: Checked

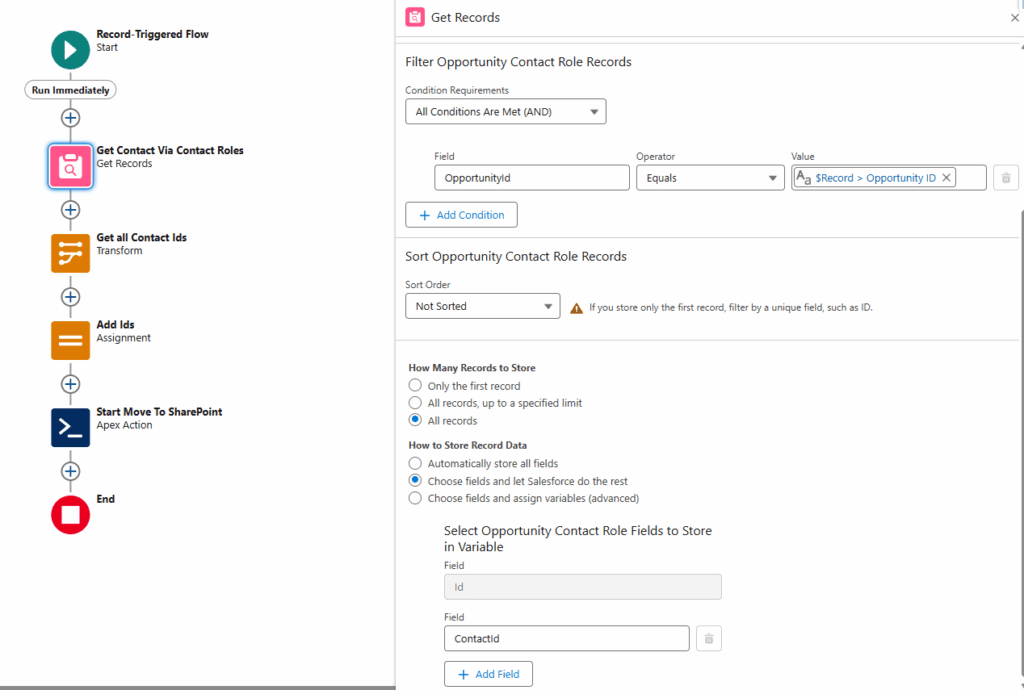
- Get the Contact
- We get the records via the Opportunity Contact Role (filtered via Opportunity Id)

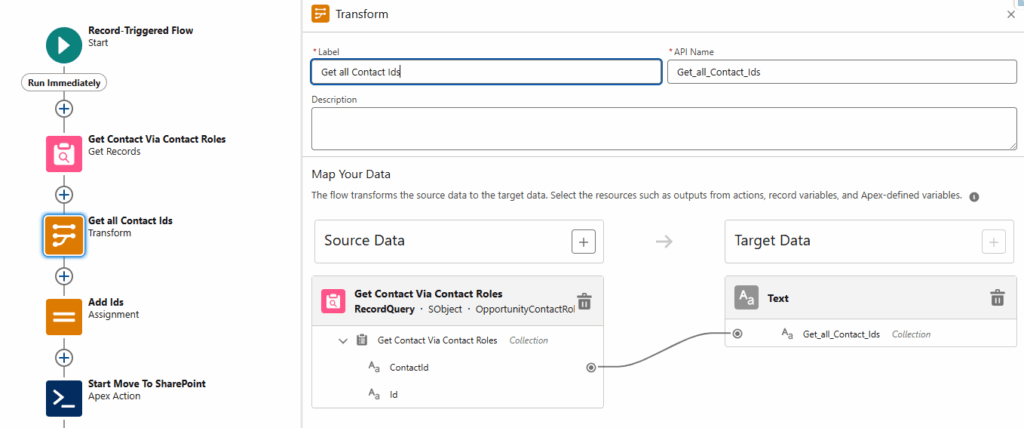
- Add all Contact Ids to a Collection, we can use a Transform element or a Loop (this is not a course on Flows, follow the Salesforce Flow documentation if required)

- Add all Ids to the “allIds” variable
- The Opportunity Id
- The Account Id
- All Contact Ids

- Start the move by calling the “Start_Move_To_SharePoint” Flow Action. Input values:
- Flow API name that sets the properties: this can be the same flow described above that is set in the Custom Setting. But here, it will not use the Custom Setting, so you can define multiple Flows for your specific use-case and set them in each trigger you need. Or re-use the existing one
- List of Record Ids: That is the “allIds” variable that has all record Ids of all records from which we want to move related Files

- Files will be moved asynchronously. If there are big Files or a lot of Files to move. This can take some time.
