As you already know, you can Seamlessly manage documents by Integrating Salesforce with SharePoint. You can setup this integration by following the steps mentioned in this document.
You can add multiple Tenants for SharePoint in your COLLABORATION Butler Admin tab.
Limitations: Please note that there are some limitations to use Multi-Tenants for SharePoint. Please consider these before using this feature.
- A User can only belong to one Tenant.
- There should be only one COLLABORATION Butler (O365 Edition) component on the record. If there are multiple, they might overwrite the Tenant Info on the User.
- Admin user should only have the default settings which are used to setup O365 info. No tenant should be created for this Admin User as Collaboration Butler cannot know which to use if a tenant is created for Admin user.
Steps to add Multiple Tenants:
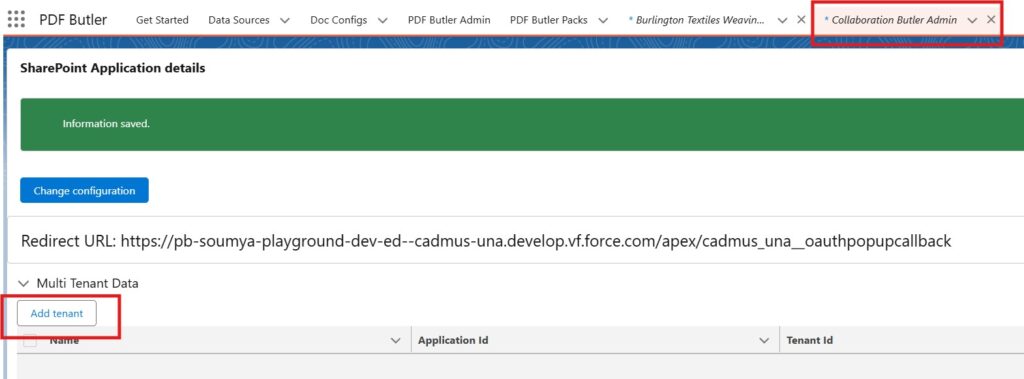
- Search for Collaboration Butler Admin app in app launcher and you can add Multiple Tenants by clicking Add Tenant button in the app as shown below

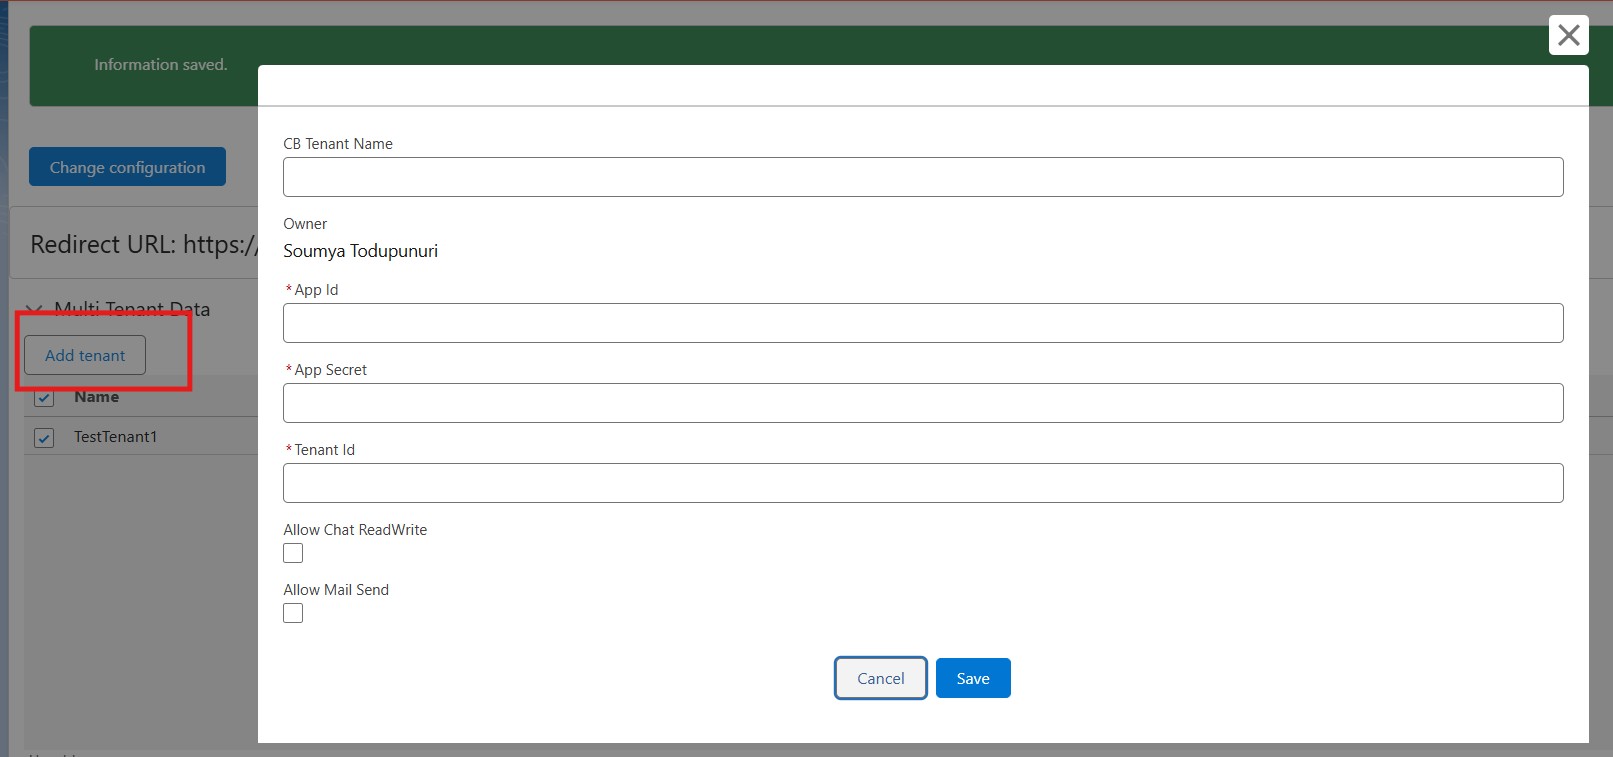
- Please Fill out the information described in the image, it is important to verify every detail carefully.

- Create TestTenant1 with Application Id, App Secret and Tenant Id copied from the O365 setup

- Likewise, you can add multiple tenants.
COLLABORATION Butler (O365 Edition) Component Setup:
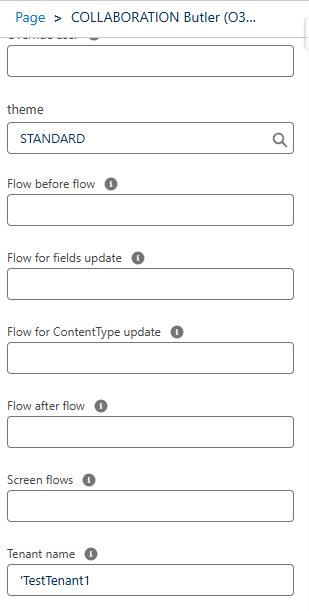
You can add COLLABORATION Butler (O365 Edition) component on the record(lets say Opportunity record) and you will see all the component fields to enter.


When the field “Tenant name” field starts with a single quote, the value of the field will be used (without the single quote).
For Example: We have created TestTenant1 in the collaboration admin setup, if field name is given as ‘TestTenant1 , then value TestTenant1 will be used by the component.
When the field “Tenant name” DOES NOT start with a single quote, the component will look for a field on the current record with that API Name. So for instance: My_Tenant__c, then component will look for the field with that API name.


