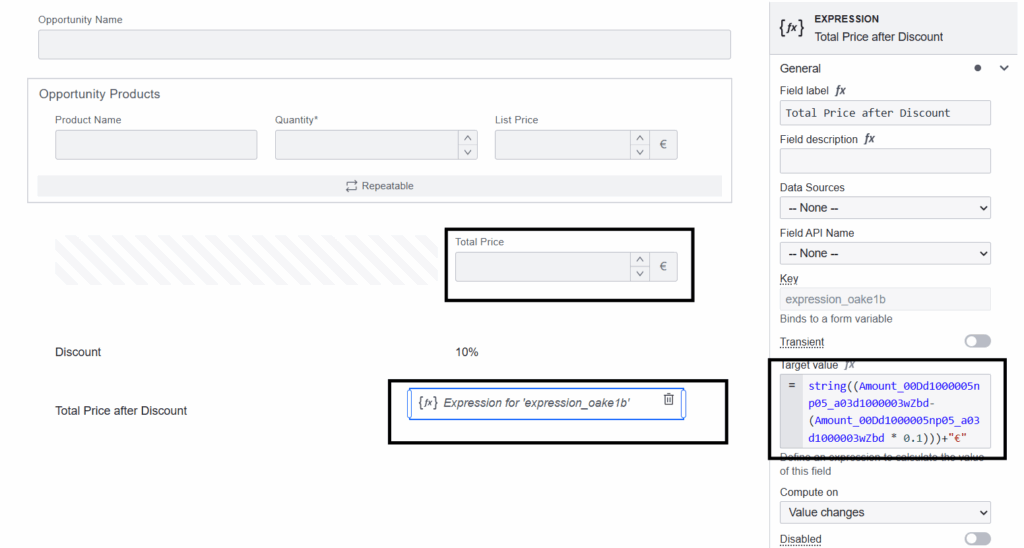
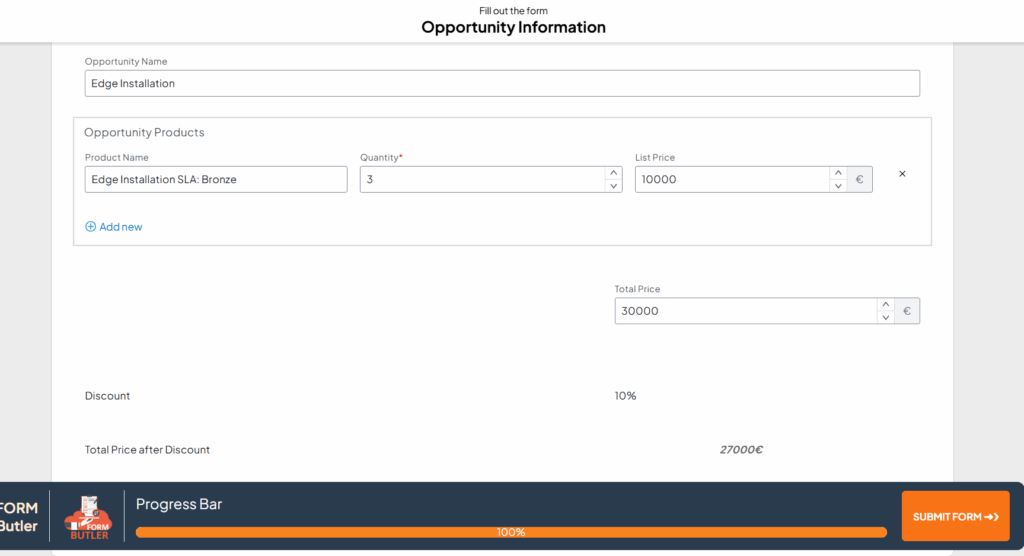
Web forms provide Expression element that allows you to execute math operation with the rest of the fields on the form, including values coming from Salesforce. With the help of the Expression element, you can create dynamic forms that could depend on math operations to show and hide a field on the form. Below are the settings you see after adding Expression element to the web form.

General
- Field label : Label of the Expression form element you wish to display through web form.
- Field Description : A description of the Expression form element, typically providing details on the kind of data it captures.
- Data Sources : Create Data Sources to extract data from Salesforce. These Data Source will appear here.
- Field API Name : Select the Data Source field to map your Expression form element here.
- Key : Each form element you add to your web form has a unique, automatically generated value. That is visible here.
- Transient : If enabled, field will not be saved in Salesforce after submitting the Web Form.
- Target value : Define an expression to calculate the value of this field as shown in below example.

As you already know, every form element will have a unique key. Make use of this key to refer to the value of that particular form element in “Target Value” editor. In the above example, 10% discount should be applied on Total Price. This can be achieved by adding Expression form element and assigning its target value with mathematical formula Total Price key-(Total Price key*0.1)

- Compute on : You can choose to calculate the expression whenever Value Changes or Form is Submitted.
- Disabled : If enabled, then you cannot edit the field, and data will not be submitted. Takes precedence over read only.
- Read Only : If enabled, then you cannot be edit the field, and data will still be submitted.
Condition
- Deactivate if: Condition under which the field is deactivated.
Layout
- Columns: By default, this is Auto, meaning that you divide the form based on the number of form elements you add in a single row. You can change it according to your business needs, so that you divide the form into the number of columns mentioned here.


