Web Form Translation allows administrators to create and manage multilingual versions of a web form. This ensures that end users can view and submit forms in their preferred language without creating separate forms for each language.
Create Data Source #
Navigate to Data Source.
Click ‘New’ Button.
Set the following values:
Record Type: STATIC VALUES
Click ‘Next’ button
- Data Source Name: g. User Guide Translation
Click ‘Save’ button
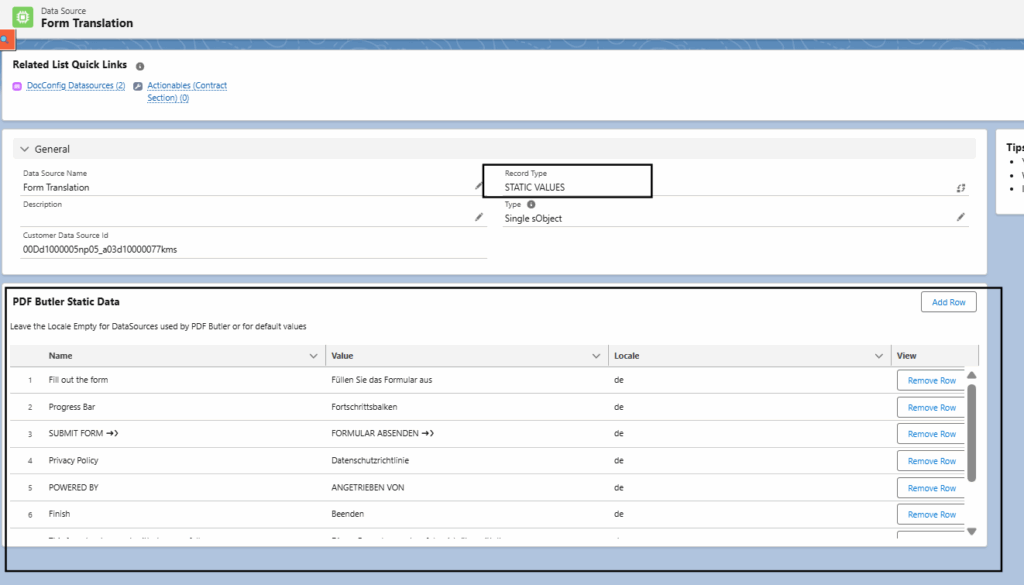
Add Static Translation Values #
- Open the created Data Source.
- Click Add Row.
- Fill in the following fields:
- Name – This is the label of the interface, such as Progress Bar, etc.
- Value – This is the translation of the label you want to display.
- Locale – This is the language in which you want the label to be displayed.
Available Interface Values for Translation #
You can translate the following Web Form elements PDFButler-Web Form translations…:
- Fill out the form
- Progress Bar
- SUBMIT FORM →
- Privacy Policy
- POWERED BY
- Finish
- This form has been submitted successfully
- You will receive a copy in your email, now you can close the page.
- Close ✕
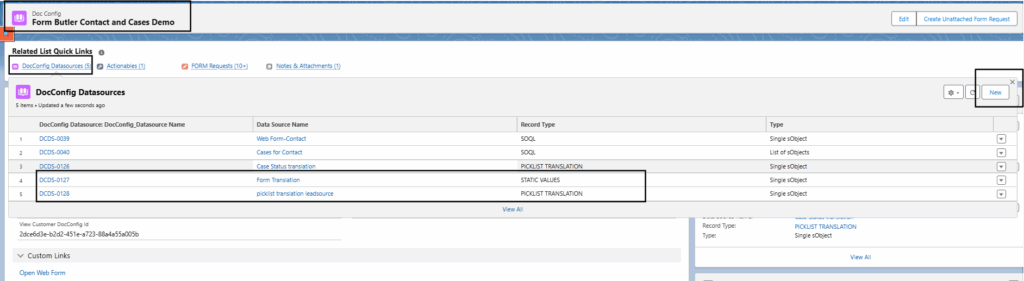
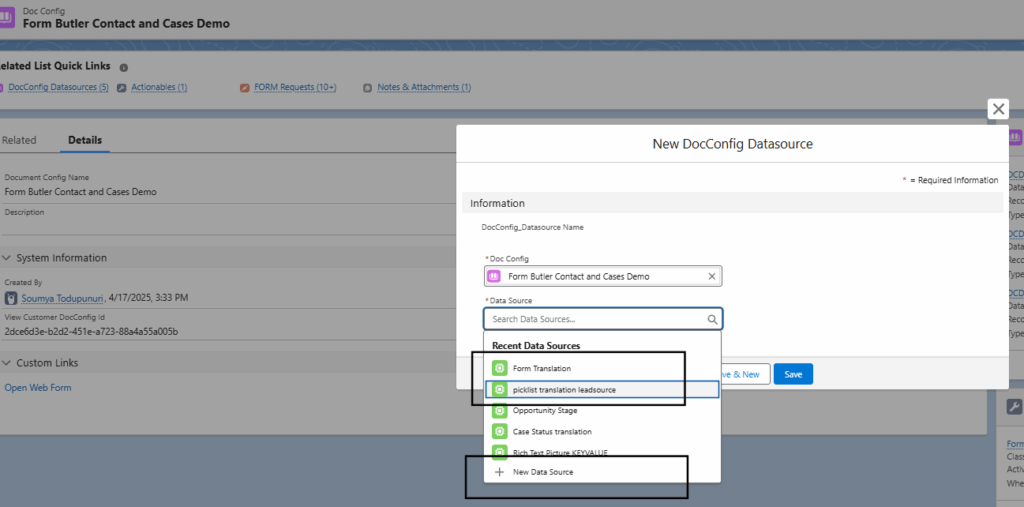
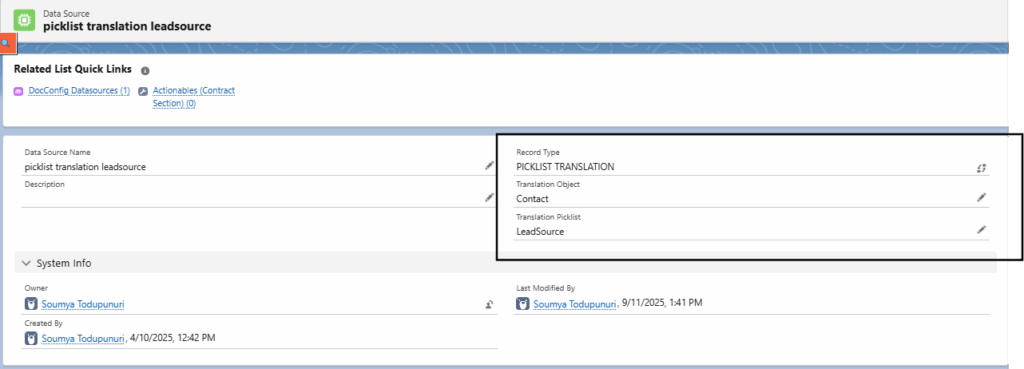
Link Data Source to the Doc Config #
Go to the Doc Config (where you want to use the translation)

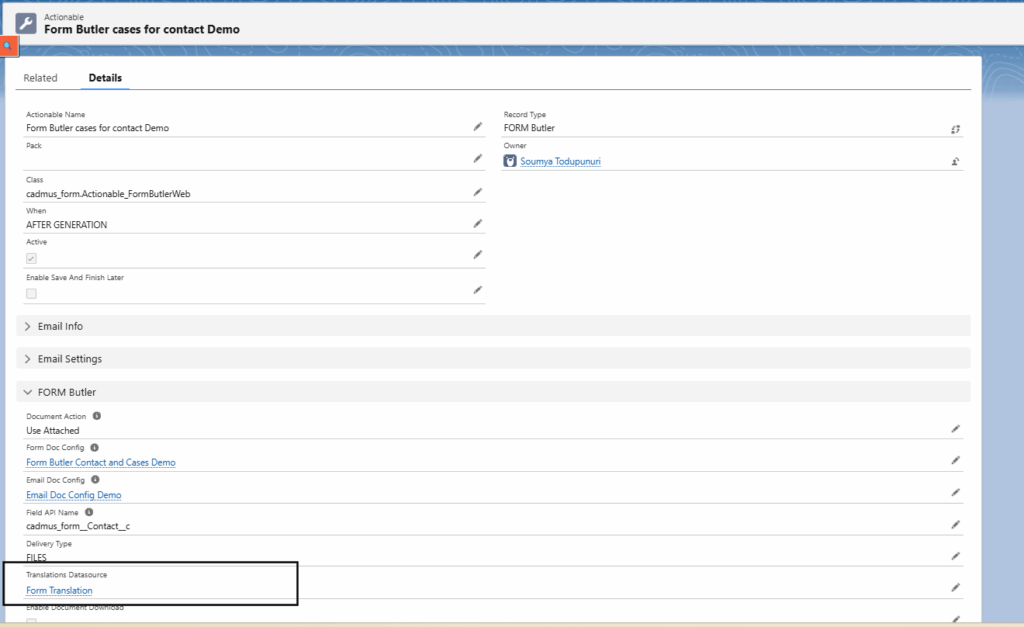
Create Actionable #
Create an Actionable. Go to the Doc Config, navigate to the Actionable section, and click the ‘New’ button.
Select the ‘Form Butler’ record type and click ‘Next
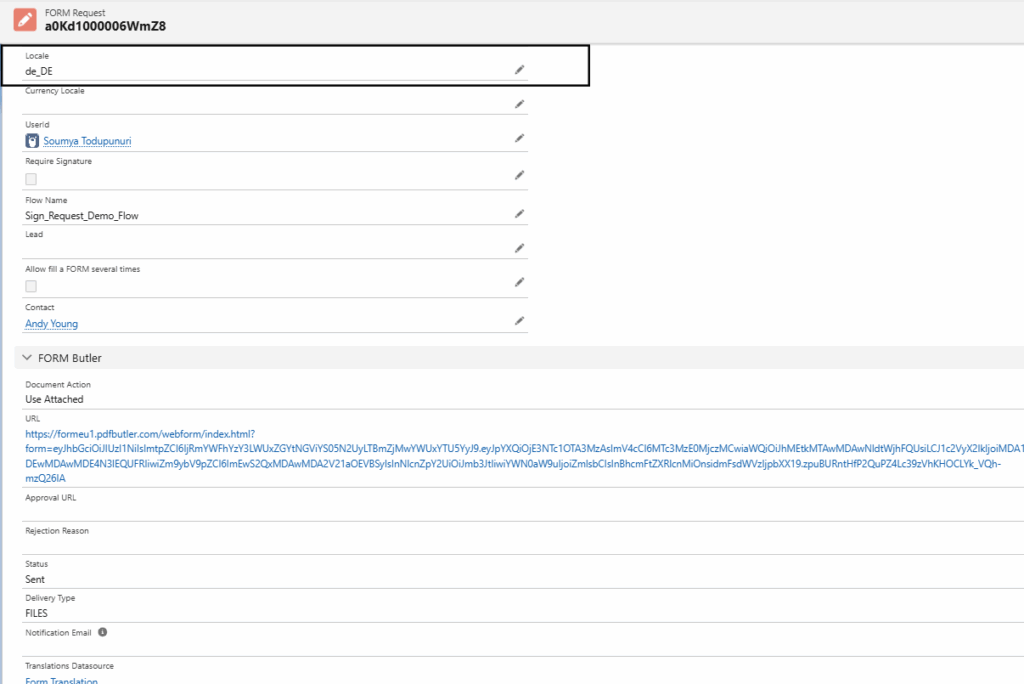
Fill in all required fields: Actionable Name, Class, When, Document Action, Form Doc Config, Email Doc Config, Field API Name, and Translations Data Source. Then, click the ‘Save’ button.
Add Data Source to Actionable

Translate Picklist #
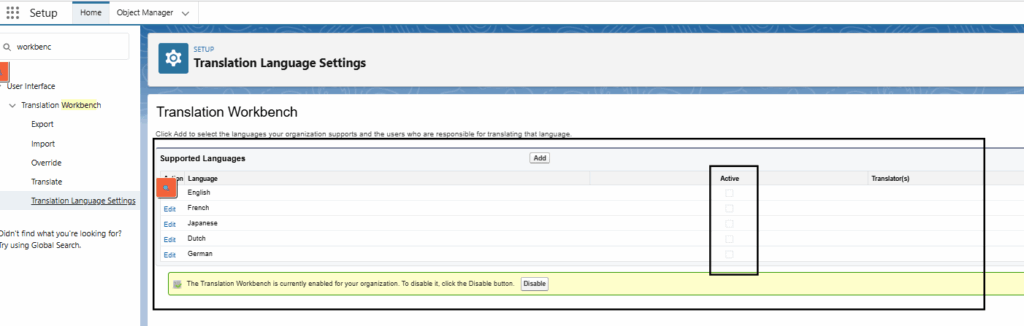
Go to the setup and type ‘Translation Language Settings’ in the Quick Find field. There, you can see the active languages
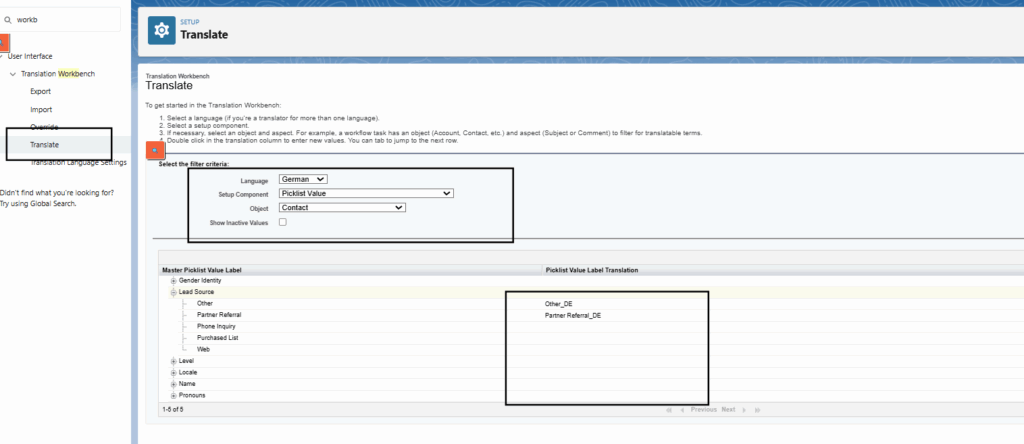
Then, go to the Translate section. In the Language dropdown, select German (for example). For the Setup Component, choose Picklist Value and Object – Case. Select ‘Priority’ and add the picklist value label translation as shown on the screen

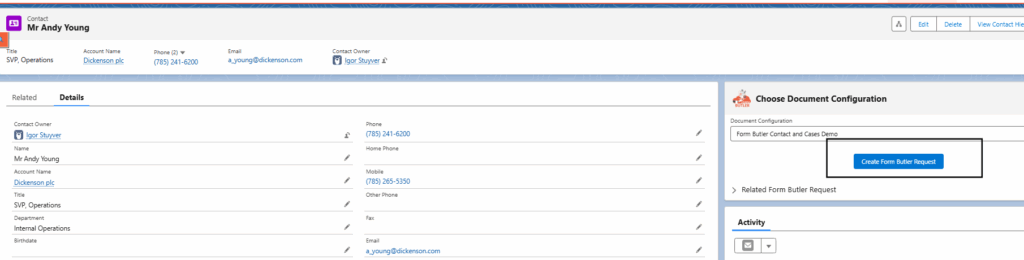
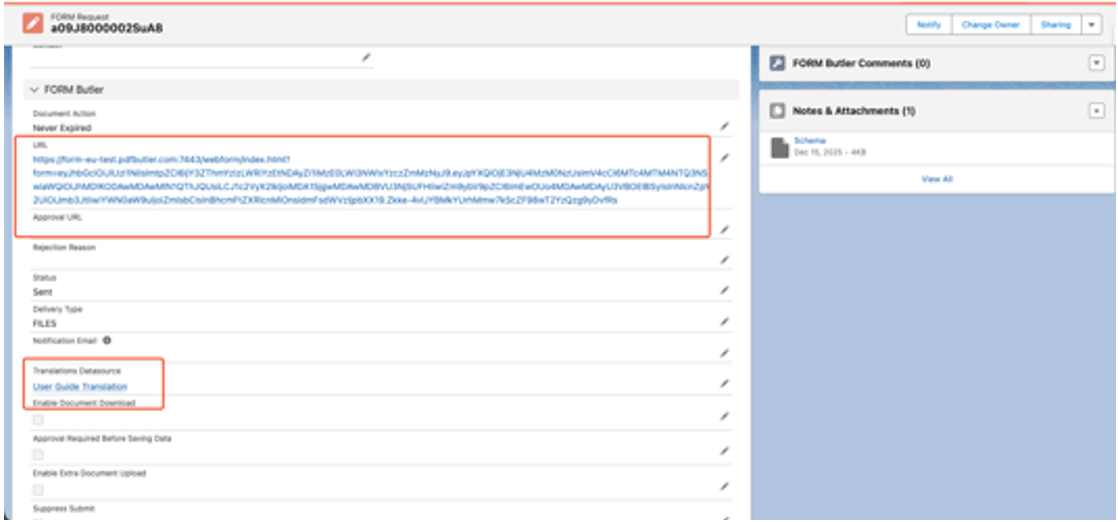
Create a FORM Request #
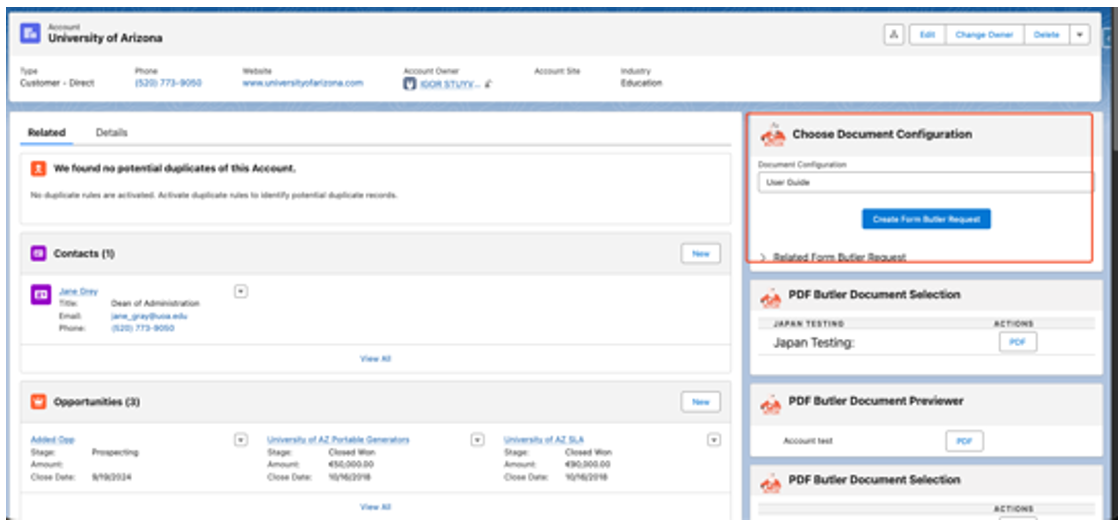
Go to the Account, in the “Choose Document Configuration” field select your Doc Config, and click “Create Form Butler Request”
A Form Butler Request with a URL should be created
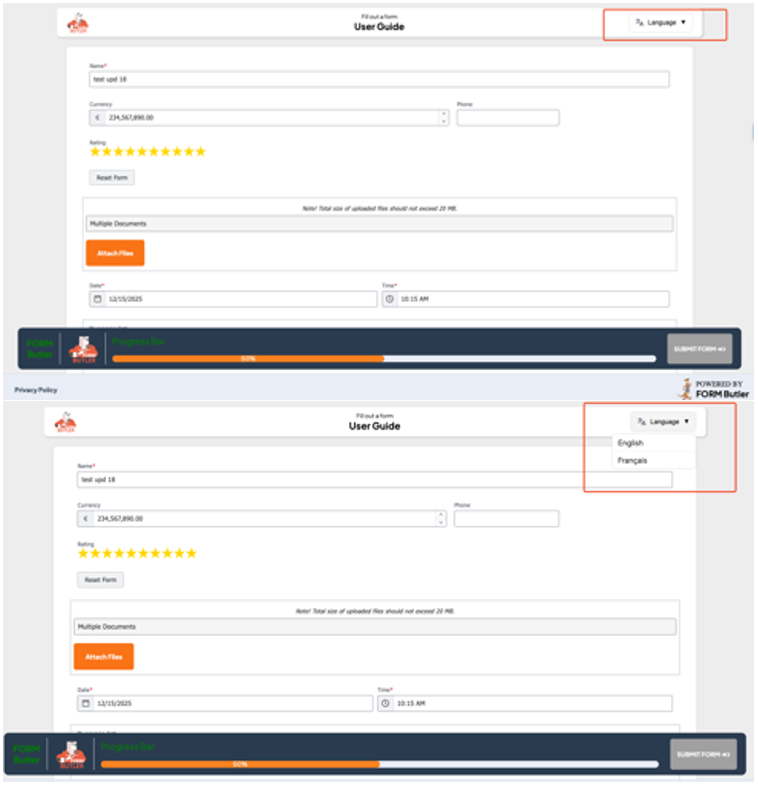
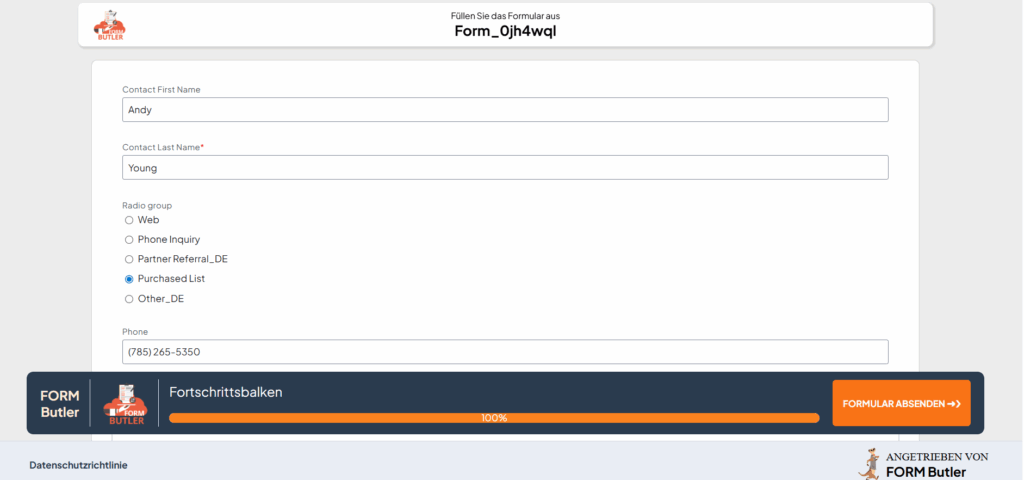
Click the URL, and the form will open with fields prefilled from the Account. In the top-right corner, you will see the “Language” button, where you can select a language.