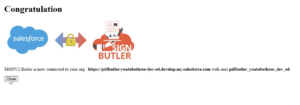
Learn how to setup SIGN Butler, configure the permission sets and register. To register, make sure to have your PDF Butler username and Admin password.
Class: cadmus_sign2.Actionable_SignButlerSilent
Or watch the setup here:
Introduction #
This guide walks through the complete installation and configuration process for Sign Butler in Salesforce. By following these steps, you will be able to:
- Install Sign Butler
- Configure permissions
- Register your Sign Butler environment
- Create signer data sources
- Configure sign request templates
- Set up document signing
- Send documents for signature directly from Salesforce
- Signing the document
This setup example uses an Opportunity-based signing process, but the same approach can be adapted for Quotes, Contracts, or custom Salesforce objects.
Prerequisites #
Before installing Sign Butler, verify the following requirements:
1. Verify PDF Butler Installation #
Sign Butler requires PDF Butler to be installed and properly licensed.
Confirm that:
- PDF Butler is installed in Salesforce.
- The license is active and not expired.
2. Complete the PDF Butler Setup #
Before continuing, complete the PDF Butler “Create Your First Document” setup guide.
After completing the setup, verify that a Quote Doc Config exists.
Navigate to: PDF Butler → Doc Config
You should see the Quote document configuration created during the PDF Butler setup process.
3. Enable Lightning Email Templates #
Sign Butler uses Salesforce Lightning Email Templates for all email communications.
To enable them:
- Open Salesforce Setup.
- Search for Lightning Email Templates.
- Enable the feature if it is not already active.
Once enabled, Sign Butler can send emails using Salesforce’s email framework.
Installing Sign Butler #
Step 1 – Access the Sign Butler Academy #
Navigate to the Sign Butler Academy and locate the installation guide.
From there, access the Salesforce AppExchange listing.
Step 2 – Install from AppExchange #
On the AppExchange page:
- Click Get It Now.

- Log in with your Salesforce credentials.
- Select the environment where Sign Butler should be installed:
- Production
- Sandbox
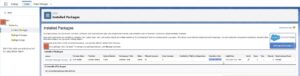
Step 3 – Confirm Installation #
During installation:
- Verify your information.
- Accept the terms and conditions.
- Choose whether to receive email communications.
- Click Confirm and Install.
The installation process may take several minutes.
Salesforce may display a message indicating that installation is still processing. If this occurs, wait for the completion email before proceeding.
Assigning Permission Sets #
After installation completes, assign the appropriate Permission Sets.
Navigate to: Setup → Permission Sets
Sign Butler Admin Permission Set #
Assign to:
- Salesforce Administrators
- Users responsible for configuration
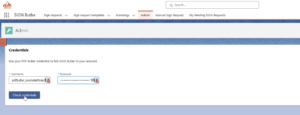
Registering Sign Butler #
- Open the Sign Butler App
- Navigate to: Sign Butler → Admin
- Enter PDF Butler Credentials
Use the credentials received during PDF Butler registration.
You will need:
– PDF Butler Username
– PDF Butler Admin Password - Click Check Credentials.
- Authorize the connection.
- Allow Sign Butler to connect to your Salesforce environment.
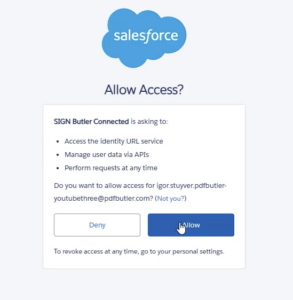
Once validated, registration is complete.
Configure Salesforce Email Deliverability #
Since Sign Butler sends emails through Salesforce, email deliverability must allow outgoing messages.
Navigate to: Setup → Deliverability
Set: Access Level = All Email

Save the configuration.
This allows Sign Butler to send signing-related emails through Salesforce.
Link the Sign Request Object #
The Sign Request object must be linked to the Salesforce object from which signing will begin.
In this example, signing starts from an Opportunity.
- Navigate to: Sign Request Object → Fields & Relationship
- Create a new field:
Field Type: Lookup Relationship
Related Object: Opportunity
Field Label: Opportunity
Supporting Multiple Objects
Signing can start from multiple objects, simply create additional lookup relationships.
Examples:
- Opportunity
- Quote
- Contract
- Custom Objects
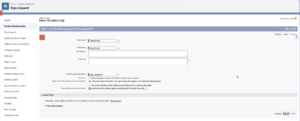
Create the Primary Signer Data Source #
Next, create a Data Source that identifies the signer.
- Create a New Data Source
Data Source Name: Primary Signer
Type: Single Object - Build the SOQL Query
Start from: Opportunity Contact Role
Retrieve: Contact ID, First Name, Last Name, Email, Opportunity ID, IsPrimary, Contact Role, etc - Add Filters: Opportunity ID = Record ID
This ensures the query only retrieves contacts related to the current Opportunity.
Create a Sign Request Template #
- Navigate to: Sign Butler → Sign Request Templates
- Create a new template.
Template Name:Quote Signing - Object: Opportunity
- Signer Data Source:
Primary Signer - Master Object Field:
Name
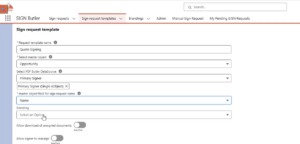
- Click Next
- Add a Signer
- Select the Signature Methods
- Inform the Data Source
- Populate ID, First Name, Last Name, Email and Language
- Click to Add
- Click Next and Submit
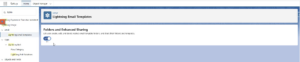
Configure Email Templates #
All Sign Butler emails use Salesforce Lightning Email Templates.
- Navigate to: Email Templates → Sign Butler Emails
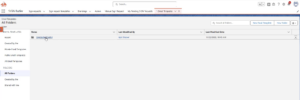
- Click the arrow to share
 3. Share with users
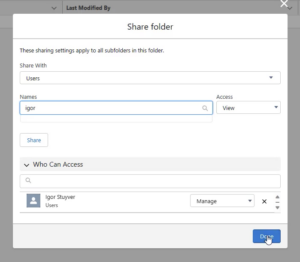
Without access to the email templates, users cannot send Sign Butler emails.
Create a PDF Butler Pack #
- Navigate to: PDF Butler Packs
- Click New
- Inform a Name
- Check the Active checkbox
- Select the Leading Doc Config
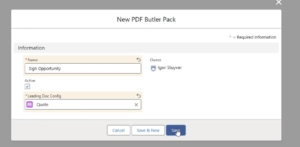
- Save it
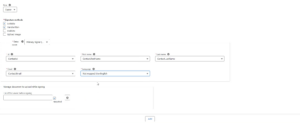
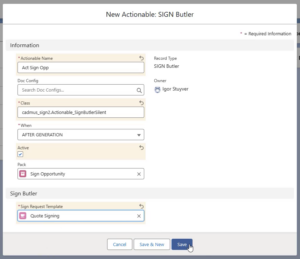
Create the Sign Butler Actionable #
- Add a new Actionable to the Pack you just created
Actionable Type: Sign Butler
Example Name:Sign Opportunity
Class: cadmus_sign2.Actionable_SignButlerSilent
Activate: Ensure the Actionable is marked as Active.
Sign Request Template
Add a Signature Placeholder #
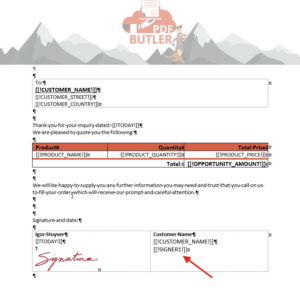
Before documents can be signed, a signature placeholder must exist in the template.
- Go to your Doc Config
- Open PDF Butler configuration
- Make sure that you have a Signer Merge Field in your document
- Create a new Config Type.
Type: SIGN_PLACEHOLDER
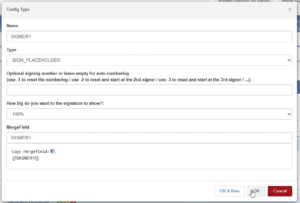
- Save it
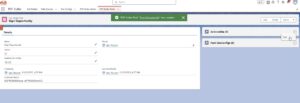
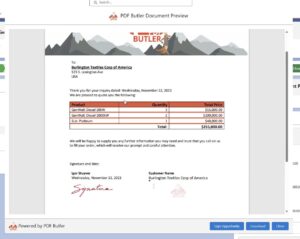
Generate the Document #
- Add the PDF Butler Previewer component to the Opportunity page.
Configure it to use the newly created Pack.
- Open an Opportunity and generate the document.
Click: Sign Opportunity
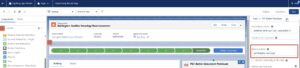
- Check the Opportunity’s related lists.
A new Sign Request record should be created. - Open the Sign Request to verify:
Signer information
Email delivery status
Request details
If the email has been sent and no errors are displayed, the setup has been completed successfully.
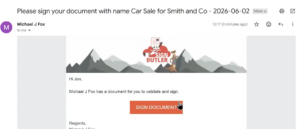
Signing the Request #
Once a Sign Request has been sent to you, follow these steps to review and sign the document:
- Open the email containing the Sign Request.
- Click Sign Document to access the document.
-
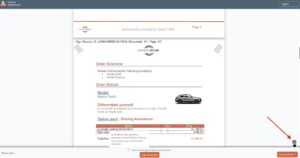
Review the document details and read through the content.
Note: To proceed with signing, you must review each page completely. Scroll to the bottom of every page, or use the down-arrow navigation button to automatically move through the document.
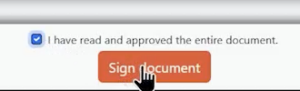
- Once you have reviewed the entire document, select the “I have read the document” checkbox.
- Click Sign Document.
- Choose your preferred signing method from the available options.

- Complete the signing process.
Once all required signers have completed their signatures:
- A confirmation email will be sent to you.
- Open the email and click the provided link to download the fully signed document.