Content Builder includes three main regions: the Highlight panel (1), the Side panel (2), and the Content Editor (3).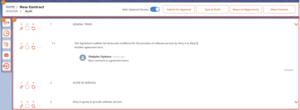
Highlight panel #
The Highlight panel includes: the Name of the contract (1), the current version of the contract (2), the current version’s status (3), toggle “Clear view” for displaying/hiding optional sections of the contract (4), a button to submit for approval (5), a button to ‘Save New Version’ (or ‘Save As Draft’ in status Draft) contract (6), a button ‘Return to Opportunity’ (7), and a button ‘Share Contract’ to share contract via e-mail (8).

Share Contract button #
‘Share Contract’ button (1) on the highlight panel allows sharing contract with external user via email.
After clicking on ‘Share Contract’ button user needs select a contact from which an e-mail will be taken (2)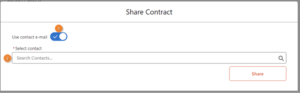
or toggle Use the contact e-mail (1) and fill in the field “Enter E-mail” (2) and “Enter Name” field (3) for the user that will be shown in the mail.
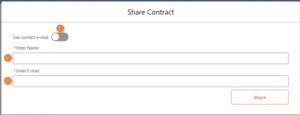
Email activity will be available in the side panel.
Side Panel #
The Side panel includes: Table of Contents, Approval history, List of Obligations, sharing contract via e-mail history, and Version history.
Table of Contents #
The Table of Contents provides a structured overview of the contract, facilitating efficient navigation. It includes the following features
- Collapse All and Expand All Buttons (1):
- The “Collapse All” button condenses all sections of the contract, making it easier to focus on specific areas.
- The “Expand All” button reveals the content of all sections, offering a comprehensive view of the entire contract.
- Hide Table of Contents Button (2):
- This button allows users to toggle the visibility of the Table of Contents, providing flexibility for a clutter-free interface.
- Navigation List (3):
- A list that aids in quickly navigating to specific sections within the contract, enhancing user accessibility and ease of use.
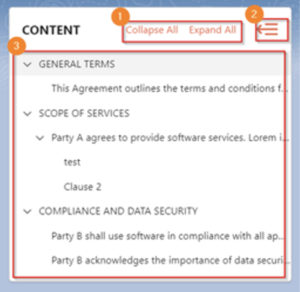
- A list that aids in quickly navigating to specific sections within the contract, enhancing user accessibility and ease of use.
Approval History #
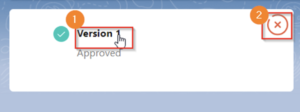
To switch between versions, click on the corresponding version (1). To close the Approval history window, click on the hide button (2).
List Of Obligations #
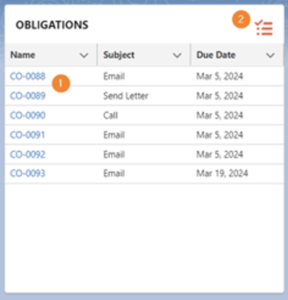
The system displays a list of obligations related to the contract instance. Clicking on a record (1) opens the selected Obligation record in a new browser tab. To close the List of Obligations, click on the hide button (2).
Email history #
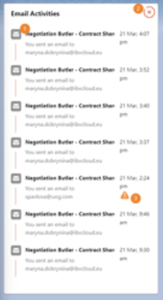
The system displays the email activity history (share contracts via email). Clicking on a record (1) opens the selected email message record in an active browser tab. To close the Email Activities, click on the hide button (2). In case when email is bounced the warning icon displays next to that mail (3).
Version history #
In the modal window, the user can view a list of changes associated with this version of the contract (1) and general information about the change (2), such as the date the change was made, the user who made the change, and the category to which the change belongs. To view information about a specific change, click the “Details” button (3). The specific change will be displayed below the table of changes with the original text of the section where the change (4) was made, as well as the corresponding change (5), which in this case is a text change. To close the window, simply click the Cancel button (6).
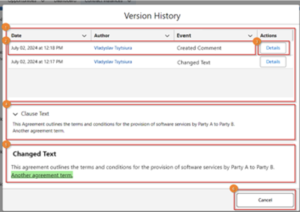
Agreement History #
On the page we can view and filter a list of document change history records.
At the top, there are filter controls where we can select Version, Start Date, End Date, Type of Change, Clause Name, and Author.
After setting filter values, the list below updates to show only matching records.
We can press the Reset button to clear all filters and reload the full list.
The table displays the following columns:
- Version – version number of the document.
- Date – date and time when the change was made.
- Author – person who made the change.
- Event – description of the change (e.g., “Created Comment”, “Changed Text”).
- Actions – contains a Details button for each record.
When we press the Details button in a row, it opens detailed information about that specific change event. The red circular button with an “X” at the top-right corner closes the whole history view.
Content Editor #
In the Content Editor, when the cursor is placed on a section/clause, the user sees the following controls: create an obligation (1), add and view comments (2), view changes (3), clause approval (4), and edit panel (5).

The icon with (?) near the section/clause shows the user a pop-up message that “The section/clause is optional.”

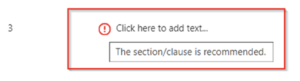
The icon with (!) near the section/clause shows the user a pop-up message that “The section/clause is recommended.”
Obligations #
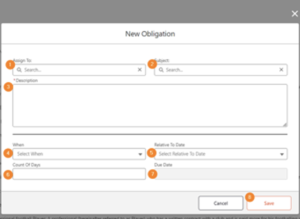
Clicking the button (1) initiates the creation of a new obligation associated with the contract instance section/clause. In the opened modal window, the user needs to perform the following actions:
- Select the Assign To user (1).
- Select or write their own Subject (2), and enter a Description (4).
- Fill the When field (4), the Relative To Date field (5), Number of Days (6), and Due Date field (7) will calculate automatically.
- Once these fields are filled, the user can click the “Save ” (8) button and a new Obligation will be created.
The user can see the newly created Obligation under section/clause (1). Also, the user can see the warning icon and the pop-up message that “List of associated obligations is provided in the table above.” (2)
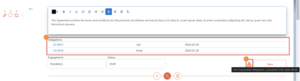
When the cursor is placed on the Obligation, the user sees a pop-up message with an abbreviated description.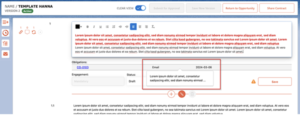
Comments #
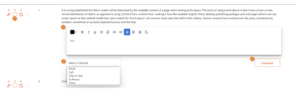
Clicking the Comments icon (4) allows the user to add the comment to the section/clause (1), select a Channel where the comment will be added (2), and save it by clicking the “Comment” button (3). The count of comments will be shown above the comments icon (4).
Clause Changes #
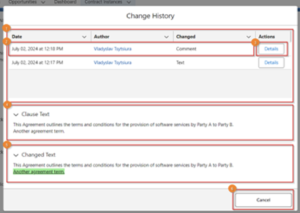
By clicking on Clause Changes (1), the user can view the modal window with changes related to this section in the current version of the contract.

In the modal window, the user can view a list of changes related to the section (1) and general information about the change (2), such as the Date the change was made, the User who made the change, and the Category to which the change belongs. To view information about a specific change, click the “Details” button (3). The specific change will then be displayed below the change table, showing the original text of the section where the change was made (4), as well as the corresponding change (5), which in this case is a text change. To close the window, simply click the Cancel button (6).
Clause Approval #
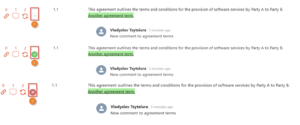
The Clause Approval checkbox indicates the status of the section (1). If the user sees a horizontal line (1), it means that the section requires approval by the user-approver. If the checkbox is green with a checkmark (2), the section has been approved by the user-approver, and all changes are correct. If the checkbox is red with a cross inside (3), the user-approver has rejected the changes, and the section needs to be corrected.