
The SOQL Builder allows Salesforce administrators to create queries that retrieve data for PDF Butler documents without writing Salesforce Object Query Language (SOQL) manually. Administrators can select the required Salesforce fields and follow relationships between objects to access related data.
This guide explains how to create and configure a query using the SOQL Builder. It also covers how to update an existing DataSource when additional Salesforce fields are needed in a document.
Step 01: Create a SOQL DataSource #
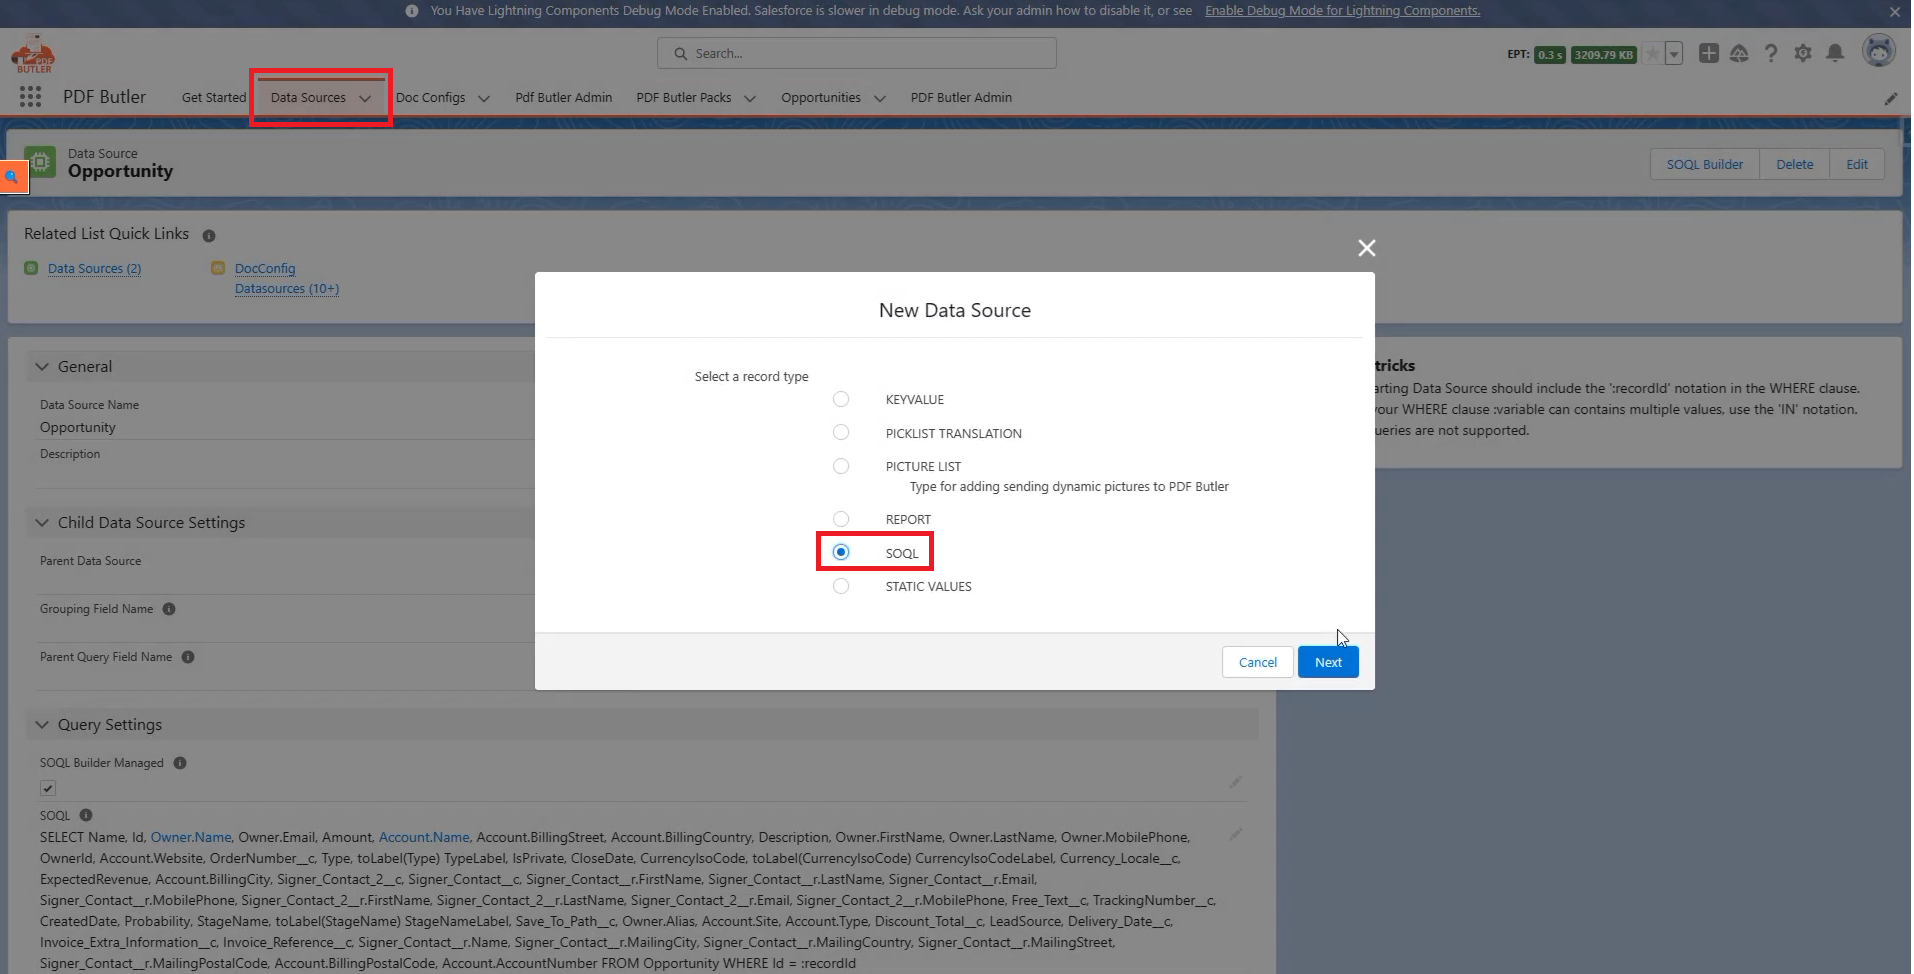
1. Navigate to Data Sources, then select + New Data Source from the dropdown menu.
2. Set the Record Type to SOQL. This allows you to create a custom Salesforce query using the SOQL Builder.
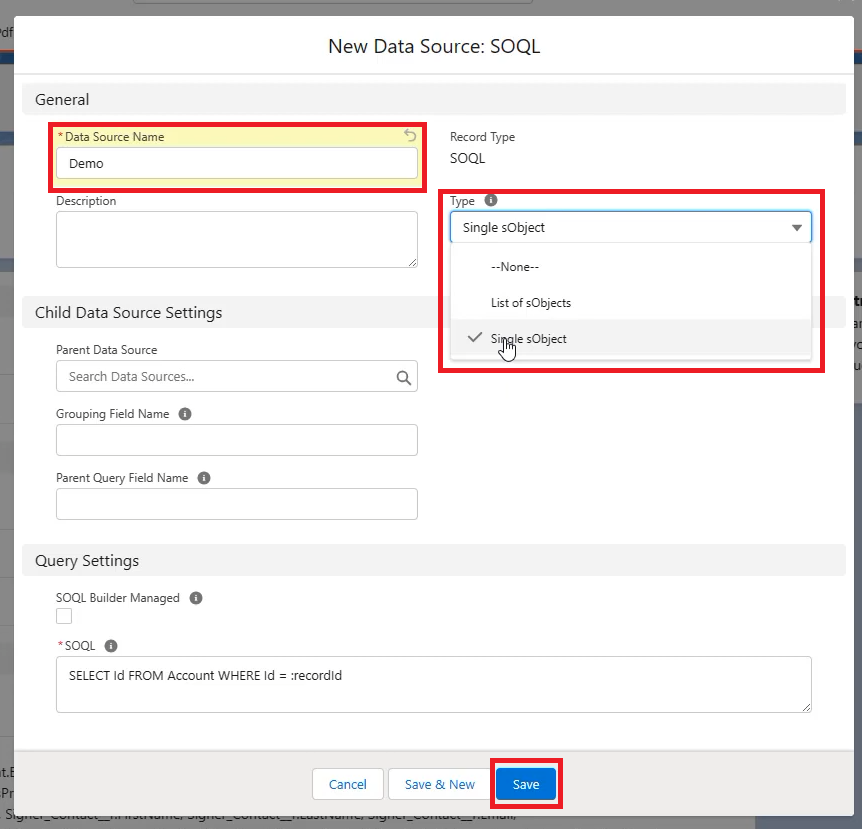
3. Enter a Data Source Name. Under Type, select the appropriate option:
- Single Object: Use when the query should retrieve a single record.
- List of Objects: Use when the query should retrieve multiple records.
4. Click Save to create the DataSource.
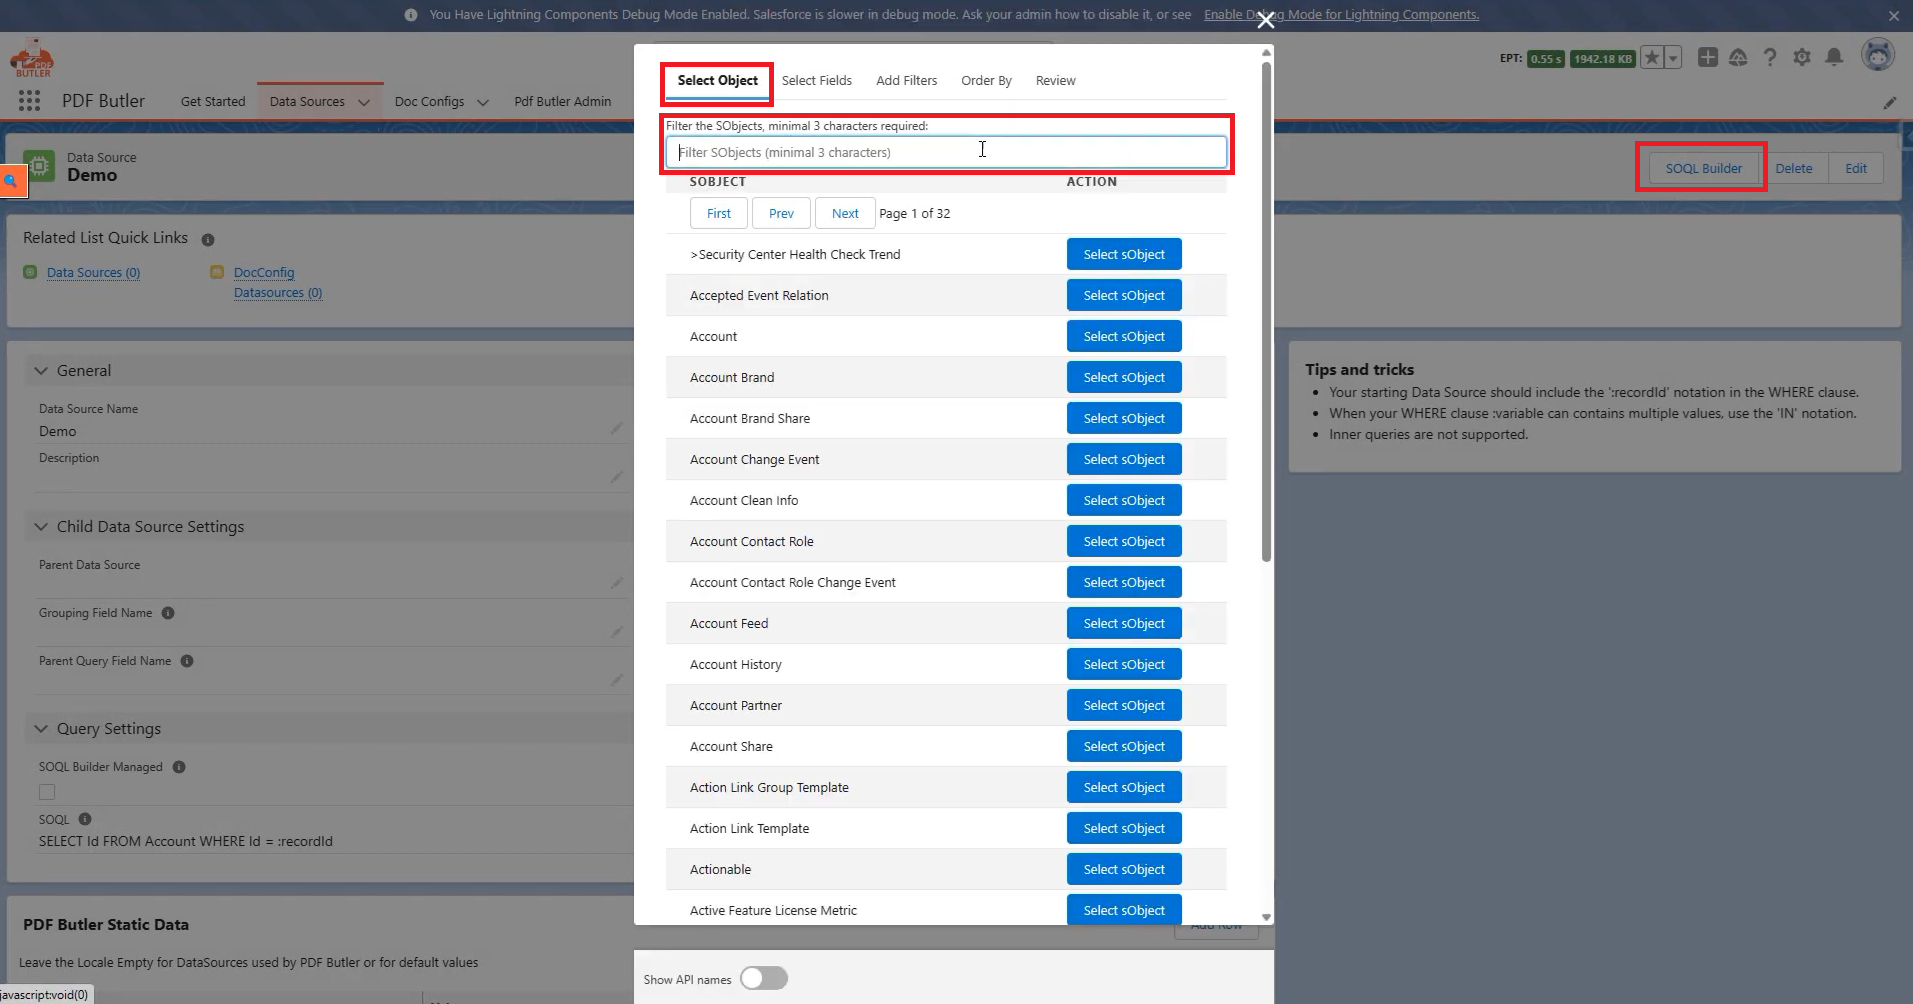
5. On the DataSource detail page, click SOQL Builder to open the query builder.
Step 02: Select the Salesforce Object and Fields #
6. In the Select Object tab, choose the Salesforce object you want to query.
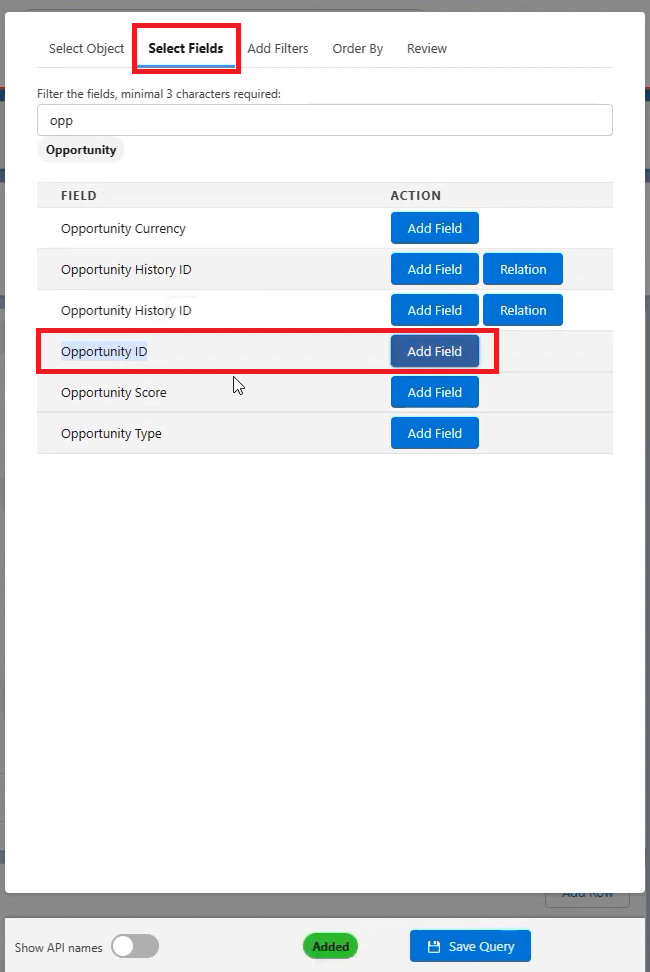
7. Open the Select Fields tab to configure which fields the query should retrieve.
8. Use the search field to locate the ID field for your selected Salesforce object, then click Add Field. You can add as many additional fields as needed for your query.
9. To add fields from a related object, locate the Relation button next to the appropriate relationship and click it to navigate to that object. Then use Add Field to select the fields you need.
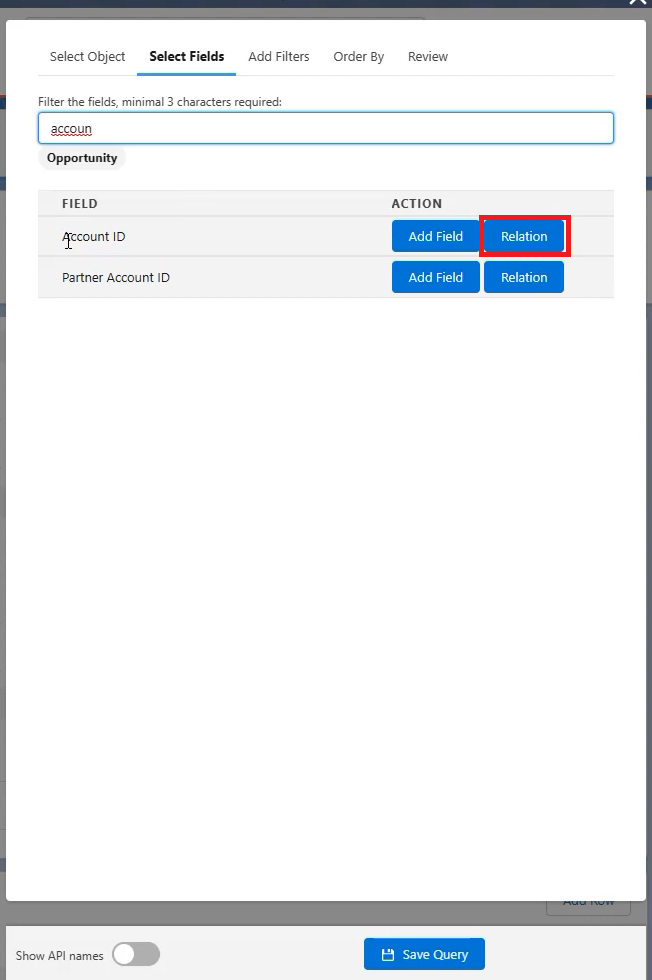
10. If needed, click Back to return to the preceding object in the relationship hierarchy. Continue navigating backward to return to the original object if needed.
Step 03: Configure Query Filters #
Filters determine which Salesforce records the query retrieves. Without a filter, a query may return thousands of records from your Salesforce environment.
11. Open the Add Filters tab. Under Create ‘Where’ Clause, select the field you want to filter on. In this example, we selected Opportunity ID.
12. Select Equals as the operator.
13. Under Select Type, choose the source of the filter value. Available options include:
- Use recordId: Filter using the ID of the Salesforce record from which the process was started.
- Use userId: Filter using the current Salesforce user’s ID.
- Custom value: Enter a value manually.
14. Select Use recordId to filter the query using the ID of the Salesforce record from which the document is generated.
15. Click Add to add the WHERE clause to the query.
16. To add another filter, select the required field and operator. For example, select Account Name and the LIKE operator to match part of an account name. Choose Custom value and enter the search text using the % wildcard as needed:
- My Account% matches values beginning with “My Account.”
- %My Account matches values ending with “My Account.”
- %My Account% matches values containing “My Account” anywhere in the text.
Step 04: Configure the Record Sort Order #
The Order By tab controls how records are sorted in the query results. This is particularly useful for List DataSources that return multiple records.
17. Open the Order By tab. Under Create ‘OrderBy’ Clause, select the Salesforce field you want to sort by.
18. Under Select operator, choose the sorting direction:
- Ascending: Sort values from smallest to largest or alphabetically from A to Z.
- Descending: Sort values from largest to smallest or alphabetically from Z to A.
19. Under Nulls First or Last, choose how records with empty values should appear in the results:
- NULLS FIRST: Display records with null values before other records.
- NULLS LAST: Display records with null values after other records.
20. Click Add to include the ORDER BY clause in the query.
Step 05: Review and Save the SOQL Query #
21. Open the Review tab to examine the generated query.
22. Review the Selected Fields section to confirm that all required Salesforce fields are included.
23. Check the Where Clauses and Order Clauses sections to verify your filtering and sorting settings. If a filter is incorrect, click Remove Where and return to the Add Filters tab to configure it again.
24. Review the generated SOQL query displayed at the bottom of the screen.
25. If your query includes Salesforce picklist fields, you can enable the option to retrieve their display labels.
26. Click Save Query to save the generated SOQL to your DataSource.
Step 06: Modify an Existing SOQL Query #
You can reopen the SOQL Builder at any time to modify an existing query without creating a new DataSource.
27. Return to the DataSource and click SOQL Builder.
28. The builder opens on the Review tab. Navigate to Select Fields or another configuration tab to make your changes.
29. Add any additional fields or update the existing query settings as needed.
30. Click Save Query to save your changes. The existing SOQL query will be updated automatically.


